In conventional construction, MEP coordination is a source of friction that compounds at every stage of the project. The mechanical engineer designs ductwork that collides with the structural engineer's beam layout. The plumbing contractor routes a soil stack through the space the electrician planned for a panel board. The fire protection subcontractor installs sprinkler mains that block the HVAC contractor's planned diffuser locations. These clashes are discovered in the field. After the steel is erected, after the subcontractors have mobilized, and after the schedule has no float remaining. The resolution is a field-directed change: cut a hole, reroute a duct at a kinked angle, reduce a chase dimension, accept a lower ceiling height. Each field resolution degrades system performance and adds labor cost. Modular construction eliminates this dynamic by moving MEP installation into the factory, where every pipe, duct, conduit, and cable tray is coordinated in BIM before a single module is fabricated, and every system is pressure-tested, energized, and commissioned before the module leaves the production line. This article explains how modular MEP integration works across HVAC, plumbing, and electrical systems, and why the result is not just faster installation but measurably better building performance.
What MEP Integration Means in Modular Construction
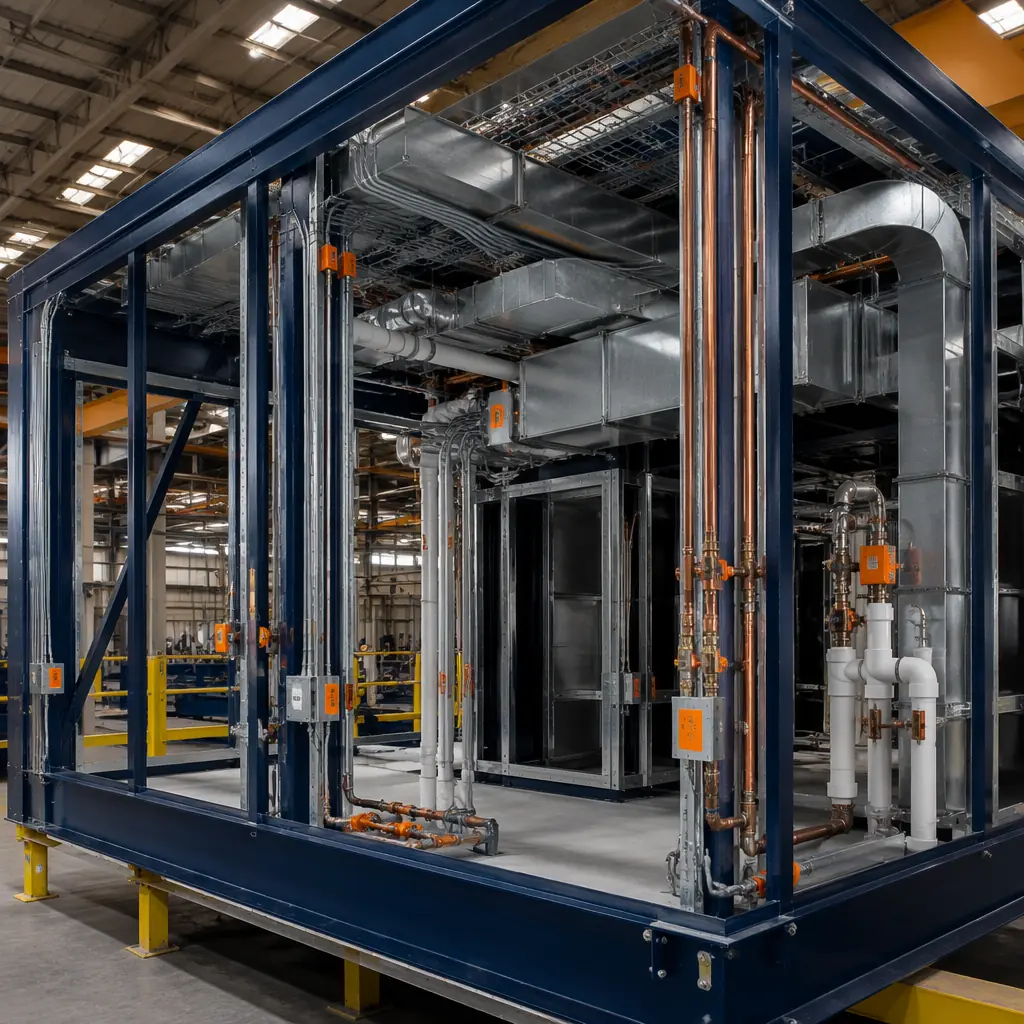
In a site-built project, MEP rough-in is the most labor-intensive phase of construction. Trades work sequentially: the plumber installs waste and supply piping, the HVAC contractor hangs ductwork and sets air handlers, the electrician pulls wire and mounts panels, and the fire protection contractor runs sprinkler mains. Each trade navigates around the others' work, and each navigation decision creates a deviation from the design intent. The result is a building whose as-built MEP systems differ materially from the coordinated model, with undocumented field modifications that complicate future maintenance and renovation.
In modular construction, MEP integration is not a site activity but a factory assembly process. The module's structural frame incorporates dedicated MEP zones: ceiling plenums sized for duct crossovers, wall cavities with pre-punched stud knockouts for conduit and piping, and floor assemblies with recessed drain channels for bathroom and kitchen modules. At defined stations on the production line, each trade installs its systems against a BIM-coordinated layout that has already resolved every clash. The module cannot proceed to the next station until the current station's work is complete and inspected, a gated workflow that our deep dive on factory QC systems explains in detail.
The time impact is substantial. On a 100-unit apartment building, site-built MEP rough-in typically requires 12–16 weeks with 4–6 trades working in overlapping sequences. The same MEP scope in a modular factory is completed in 3–4 days per module, with all modules running through the production line in parallel over 8–12 weeks total. The labor hour reduction, 60–70% compared to site-built, comes from three sources: no trade stacking delays, no field rework from clashes, and the efficiency of a controlled factory environment where every tool, material, and fixture is at arm's reach.
HVAC Integration, Duct Routing, VAV Systems, and Heat Pump Installation in Module Ceiling Plenums
HVAC represents the largest spatial coordination challenge in any building. Ductwork requires cross-sectional area proportional to airflow volume, and in a site-built project, ducts compete with structural beams, plumbing risers, electrical trays, and fire sprinkler mains for limited ceiling cavity space. The result is often a compromised duct layout: flattened oval ducts where round ducts were specified, reduced cross-sections at beam crossings, and extended flexible duct runs that increase static pressure and reduce system efficiency.
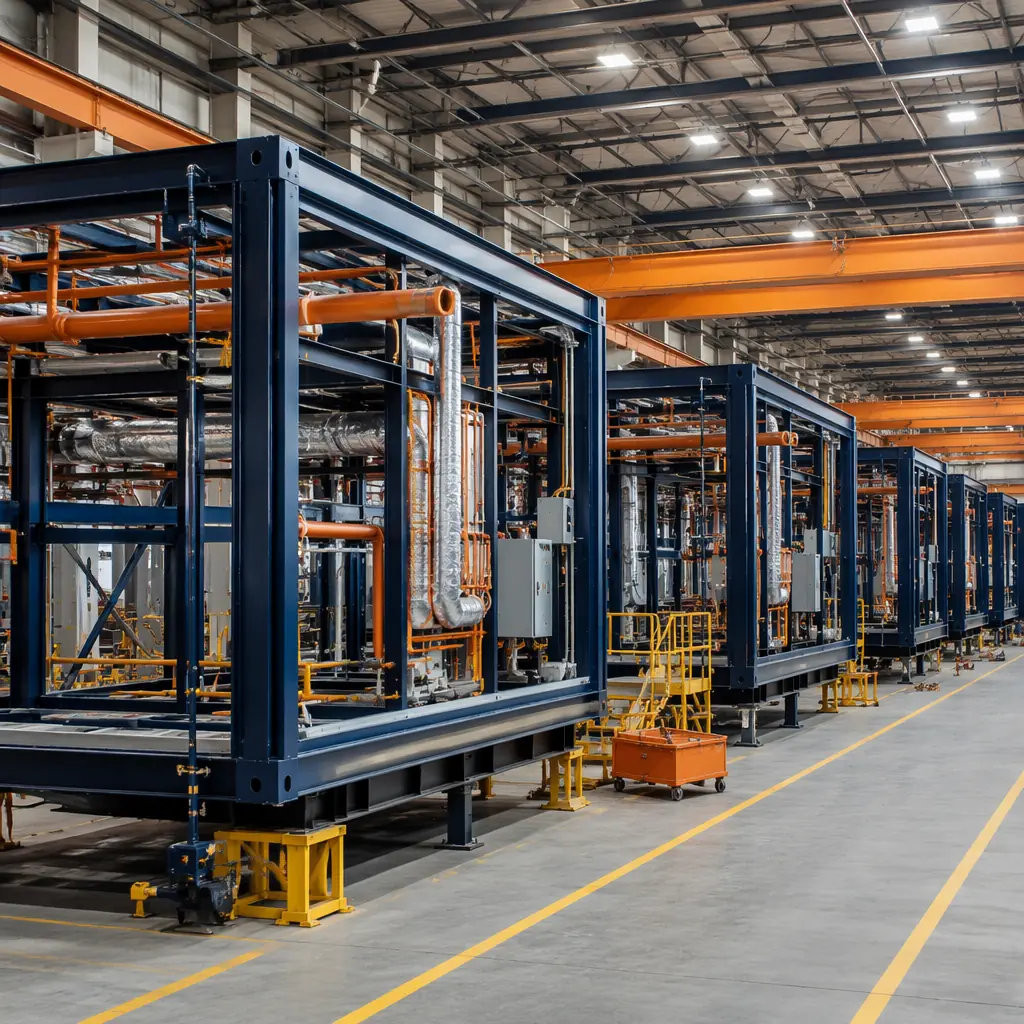
In modular construction, the module ceiling plenum is designed as an integrated HVAC zone from the outset. The structural engineer sizes the plenum depth (typically 300–450mm for residential modules, 500–750mm for commercial and healthcare modules) to accommodate the specified duct cross-sections at the design airflow velocities. Duct routing is coordinated in BIM to avoid conflicts with the module's structural cross-bracing and the plumbing risers that occupy dedicated wall chases. Rigid galvanized steel ductwork is pre-fabricated in sections sized to fit within a single module, with flanged connections at module joints for field assembly. For VAV systems common in office and hotel applications, the VAV box and reheat coil are installed in the module ceiling plenum at the factory, pre-piped to the hydronic supply and return risers and pre-wired to the module's electrical panel.
Heat pump integration follows the same factory-preinstallation logic. In multi-family modular projects, individual water-source heat pumps are installed in each module's mechanical closet at the factory, with the condenser water risers pre-piped through the module's vertical service chase. The heat pump is connected to the module's supply and return ductwork, the condensate drain is tied into the module's plumbing waste stack, and the unit is wired to the module's electrical panel, all before the module leaves the factory. On site, the only HVAC work is connecting the module-to-module duct flanges, joining the condenser water riser couplings at the module joints, and tying the building-level condenser water loop to the central plant. This approach eliminates 80–90% of on-site HVAC labor compared to a conventional build.
Plumbing Integration, Riser Stacks, Bathroom Pod Connections, and Factory Pressure Testing
Plumbing in modular construction follows a stacked riser strategy: vertical service chases are aligned across modules so that when modules are stacked on site, the plumbing risers in each module align to form continuous vertical stacks. The risers themselves: typically copper or PEX for domestic water, cast iron or PVC for DWV. Are pre-installed in each module's service chase, with branch connections pre-made to the module's fixtures. At the module joint, riser sections are connected using mechanical couplings (Viega ProPress for copper, no-hub couplings for cast iron) that can be made from within the module or from an adjacent access panel.
Bathroom pod plumbing represents the most complete expression of factory plumbing integration. As we detailed in our guide to prefabricated bathroom pods, every plumbing fixture in a pod, toilet, sink, shower, bathtub, is piped to four external connection points: hot water inlet, cold water inlet, waste outlet, and vent connection. The pod is flood-tested for 24 hours before leaving the factory, with the entire pod filled with 50mm of standing water to verify waterproof membrane integrity and all pipe joints pressure-tested at 1.5x working pressure per IPC requirements. This is a testing standard that is physically impossible to apply to every bathroom in a site-built project, and it is the reason pod manufacturers can offer 10–15-year leak-free warranties.
For non-pod modules, the plumbing testing protocol is equally rigorous but organized around the module's hold point schedule. Domestic water piping is pressure-tested at HP4 (MEP rough-in) at 1.5x working pressure for 2 hours. DWV piping is tested with a 3-meter water column or 35 kPa pneumatic test. Every joint, every branch connection, every fixture stub-out is verified against the production drawing before the wall cavity is insulated and closed. Test records are digitized and attached to the module's permanent quality dossier, a documentation trail that conventional construction simply cannot produce at the individual room level.
| Plumbing Test | Standard | Modular Factory | Site-Built (Typical) |
|---|---|---|---|
| Domestic water pressure test | IPC, 1.5x working pressure, 2 hrs | Every module, at HP4 | System-level only; individual branch circuits not tested |
| DWV stack test | IPC, 3m water column or 35 kPa pneumatic | Every module, at HP4 | Stack-level only, sampled |
| Bathroom flood test | Manufacturer standard, 24 hrs, 50mm water | Every pod, before factory release | Not performed; visual inspection only |
| Medical gas (where applicable) | NFPA 99, 1.5x working pressure, 24 hrs | Every module, third-party verified | System-level, third-party verified |
| Test documentation | Per project spec | Digital record per module, GPS-tagged photos | Paper sign-off sheet, filed on site |
Electrical Integration, Busway Connections, Prewired Panels, and Smart Building Readiness
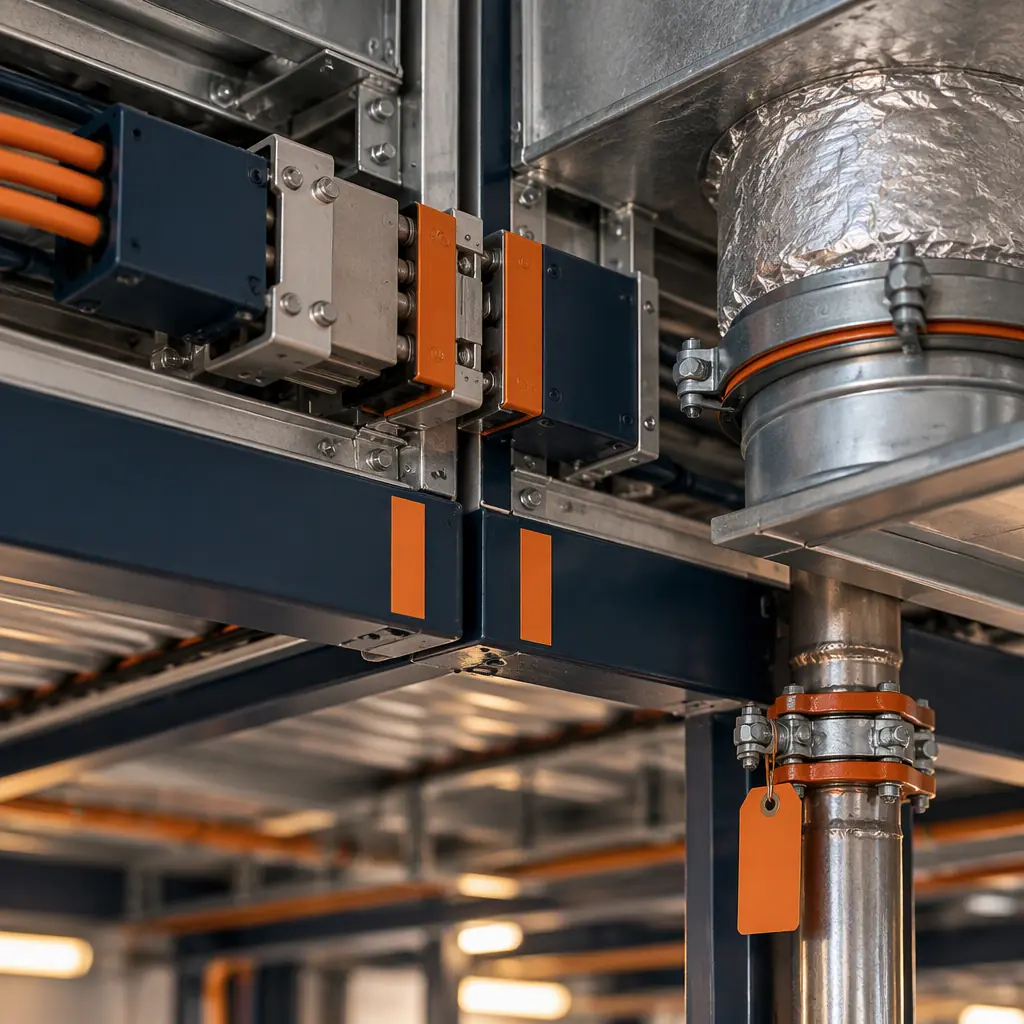
Electrical systems in modular construction follow a distributed architecture: each module contains its own electrical panel prewired to all branch circuits within that module, and the modules are interconnected through busway or feeder cable connections at the module joints. This is fundamentally different from site-built electrical installation, where a central panel board serves an entire floor and every branch circuit must be pulled from the central panel to the point of use: often through conduit runs that cross multiple rooms and require coordination with every other trade working in the ceiling cavity.
In a modular project, the module's electrical panel is mounted in a dedicated electrical closet or service chase, prewired at the factory to every outlet, switch, light fixture, and equipment connection within the module. The panel's feeder conductors are terminated at a junction box on the module exterior, and on site, the modules are interconnected using busway sections or feeder cables that plug into the junction boxes at each module joint. The building-level switchgear feeds a vertical busway riser in the service core, and each floor's modules tap off the busway through fused disconnects. An approach borrowed from data center power distribution that is increasingly used in modular multi-family and hotel construction for its speed and flexibility.
Smart building readiness is a natural byproduct of factory prewiring. Because every module's electrical system is documented in BIM, with every circuit identified, every junction box located, and every conductor gauge specified, the as-built electrical documentation is accurate to the module level, not an approximation derived from the contractor's memory of field changes. This makes the integration of building automation systems (BAS), lighting controls, energy sub-metering, and IoT sensor networks straightforward: the BAS contractor can connect to pre-labeled junction boxes at known locations with known circuit assignments, rather than tracing circuits through finished walls to determine what serves what. For projects like modular hospital construction and laboratory facilities, where the electrical documentation traceability is a regulatory requirement, this factory-wired approach satisfies documentation standards that are expensive to achieve on site.
BIM Coordination, Clash Detection Before Fabrication Begins
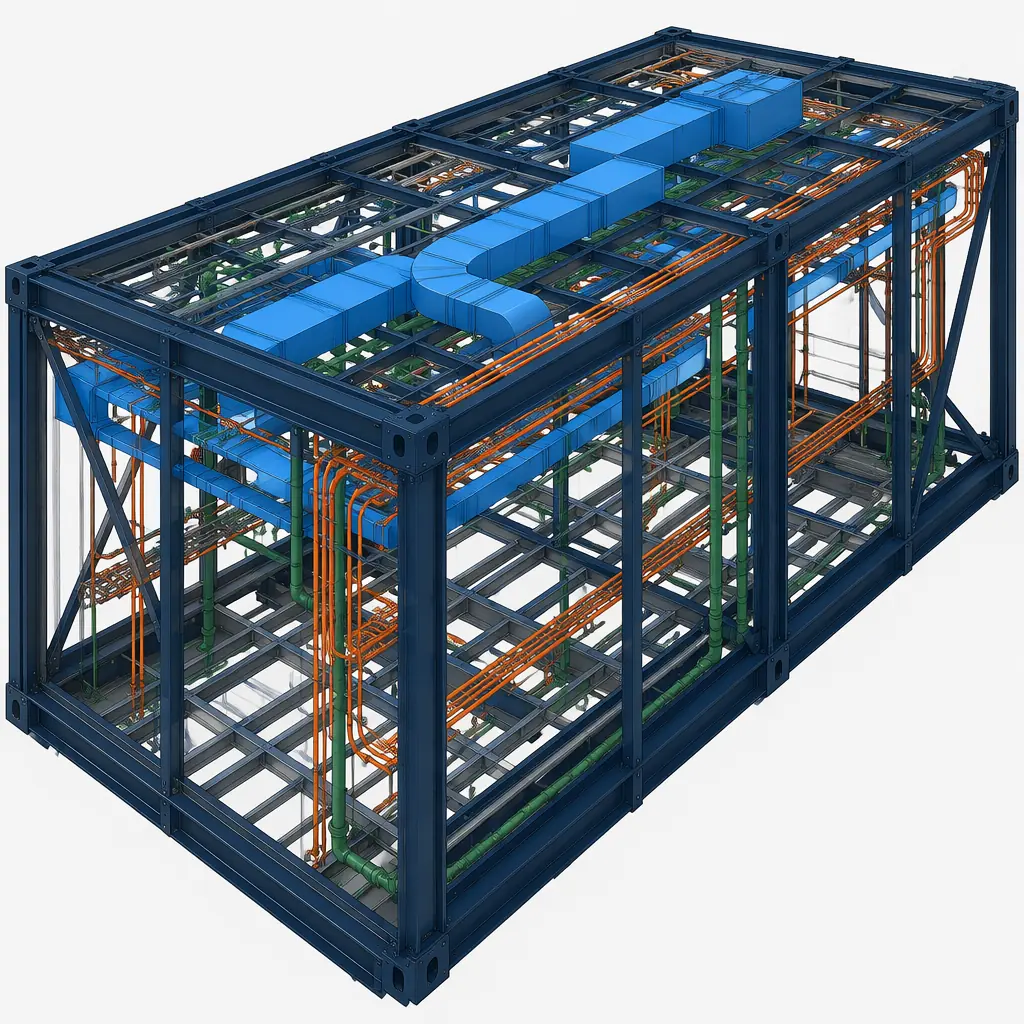
BIM clash detection is the single most powerful quality tool in modular MEP integration. In a conventional project, the MEP coordination process produces a coordinated model that is, at best, a theoretical ideal, the subcontractors who install the systems may or may not follow it, and the general contractor may or may not enforce it. In modular construction, the coordinated model is the production drawing: the factory floor cannot deviate from it because the module components are cut, welded, and assembled to the dimensions specified in the model. If the model says a duct passes 50mm above a plumbing riser at gridline C4, the factory builds it exactly that way, and the module's dimensional tolerance (±3mm) is an order of magnitude tighter than site-built tolerance (±25mm or more).
A typical 100-module building project will identify 200–400 clashes during BIM coordination, duct-to-beam conflicts, pipe-to-duct interferences, conduit-tray-to-sprinkler collisions, that would have been discovered in the field in a conventional build. Each clash resolved in the model costs minutes of an engineer's time; each clash resolved in the field costs hours of a subcontractor's time, plus the schedule delay while the RFI is processed, plus the performance degradation from the compromised solution. The BIM coordination process is covered comprehensively in our guide to BIM digital workflow for modular construction, but the key metric is this: modular projects that complete full BIM coordination before fabrication begin site assembly with zero MEP clashes, and the site MEP connection work is reduced to the module-to-module joint connections that were designed into the model from the start.
The coordination workflow typically follows a 5-stage process: (1) architectural model defines module geometry and spatial zones; (2) structural model defines frame, bracing, and floor/ceiling assembly depths; (3) MEP models are federated into the structural model and clash detection is run at LOD 350, including every duct, pipe, conduit, and equipment item is geometrically represented and checked against every other element; (4) clashes are resolved in weekly coordination meetings where the BIM manager facilitates trade-by-trade resolution; (5) the resolved model is frozen and issued as the production drawing set. No module enters fabrication until this process is complete, and no field MEP clash is possible because every system's spatial allocation was resolved before the first steel member was cut.
Quality Advantage, Factory QC Documentation, Pressure Test Records, and Commissioning Speed
The quality advantage of factory MEP integration extends beyond clash-free coordination to verifiable system performance. Every module's MEP systems are commissioned at the factory, not on site. The HVAC system is run through its operating sequence: fan startup, damper actuation, heating/cooling coil valve modulation, and airflow verification at each diffuser. The plumbing system is pressure-tested and flow-tested: every fixture is run, every drain is checked for flow, every shutoff valve is cycled. The electrical system is energized and verified: every outlet is tested for polarity and ground, every switch is cycled, every light fixture is illuminated, and the panel schedule is confirmed against the connected load.
This factory commissioning produces a commissioning report per module that is attached to the module's quality dossier. When the module arrives on site, the site commissioning agent does not need to re-verify what was already tested in the factory; they verify the module-to-module connections and the building-level systems. The result is a building commissioning process that is 50–60% faster than site-built commissioning, because the bulk of the verification work was completed in the factory under controlled conditions and documented with instrumentation-grade accuracy. This has particular value for projects pursuing LEED Enhanced Commissioning credits, which our guide to modular LEED certification addresses in detail.
Labor Comparison, MEP Hours: Modular vs Traditional
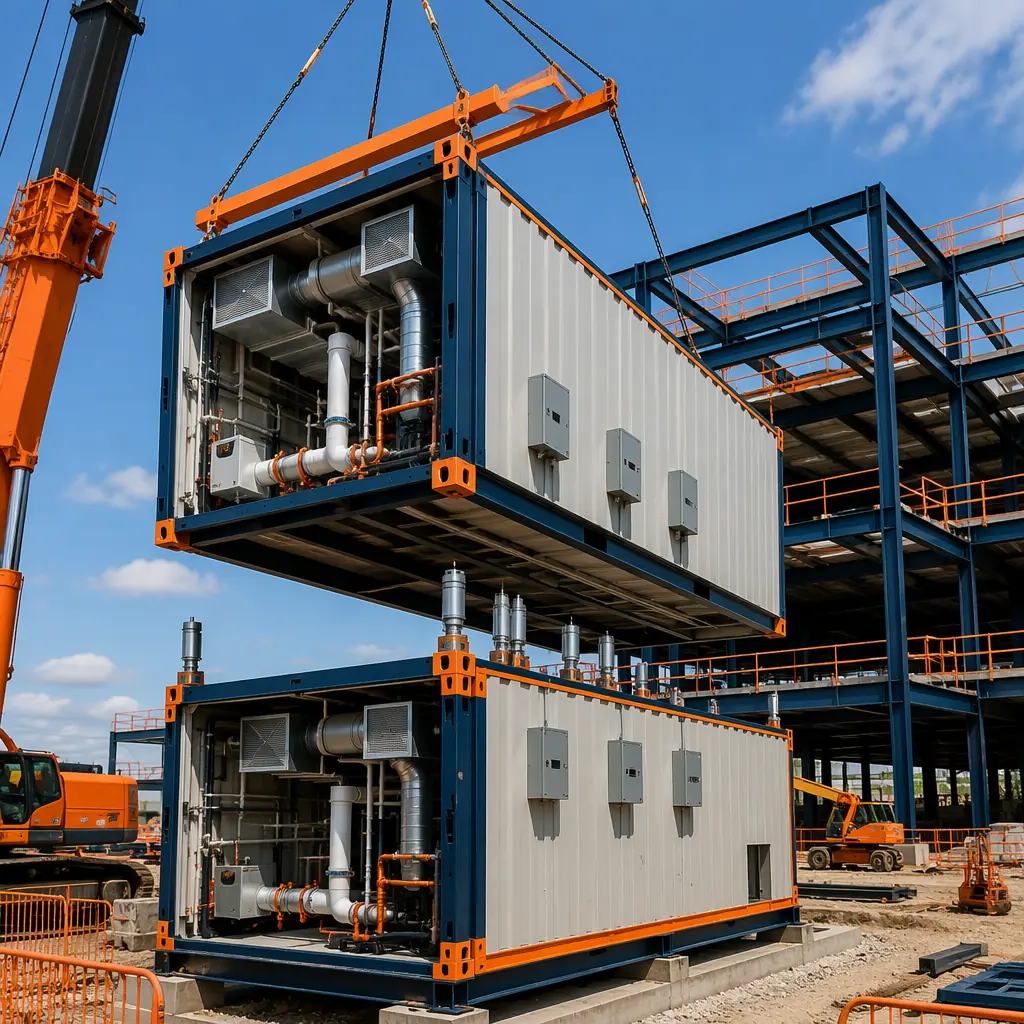
The labor hour differential between modular and site-built MEP installation is one of the most consistent data points in modular construction research. Studies from the Modular Building Institute and the National Institute of Building Sciences, corroborated by project data from completed modular developments, show a 60–70% reduction in on-site MEP labor hours compared to conventional construction. The reduction is not evenly distributed across trades; electrical work sees the largest reduction (65–75%) because of the prewired panel approach, followed by plumbing (60–70%) because of the stacked riser strategy, and HVAC (50–65%) because duct installation still requires module-to-module connections on site.
The table below compares MEP labor hours per 100 m² of building area for a representative mid-rise multi-family project:
| Trade | Site-Built (hours/100m²) | Modular (hours/100m²) | Reduction |
|---|---|---|---|
| Plumbing (domestic water + DWV) | 85–110 | 28–38 | 60–67% |
| HVAC (ductwork + equipment) | 120–160 | 48–72 | 55–60% |
| Electrical (power + lighting) | 100–130 | 25–40 | 69–75% |
| Fire protection | 40–55 | 18–28 | 49–55% |
| Building automation / controls | 25–40 | 10–18 | 55–60% |
| Total MEP | 370–495 | 129–196 | 60–65% |
These reductions are not theoretical; they are measured from completed projects. The labor that is eliminated is the labor of coordination, the labor of working around other trades, the labor of rework from field-discovered clashes, and the labor of working in weather-exposed conditions. The labor that remains is the skilled work of making module-to-module connections and commissioning building-level systems. Work that is faster, safer, and more predictable because it is performed on a completed structure with weather-tight modules.
Where the Savings Actually Land, and the Two Lines That Do Not
The 60–70% figure that circulates in modular marketing is a site labor hour figure, not a project cost figure. On a real tender the number that matters is the all-in installed cost of the MEP package, and two lines in that package move against the project when MEP is factory-installed.
Line one, the factory premium itself. A module's MEP rough-in is performed by a plant crew under covered conditions with the same wage base as a site crew, plus plant overhead, plus the module's share of factory supervision. On a 120-module residential project the factory labor rate we quote tends to run 8–12% above the equivalent open-shop site rate, and 15–20% below a prevailing-wage site rate. Whether the net is a saving depends entirely on which labor market the site sits in. A project in a high-wage, low-productivity market wins; a project in a low-wage market can lose the labor differential and keep only the schedule benefit.
Line two, the freight on volume the MEP scope adds. Mechanical and plumbing rough-in adds roughly 40–60 kg per m² of module floor area. On a 3.6 m wide, 12 m long module that is 1.7–2.6 tonnes of additional payload, and highway freight is charged on tonnes as often as on module count once a trailer approaches its axle limit. Past about 1,200 km the freight increment on the MEP weight alone can consume a fifth of the site-labor saving.
The table sets out the cost lines a modular MEP quote normally separates, which lines move in the buyer's favour, and the evidence that decides whether a claimed saving is real for a specific project.
| Cost line | What it covers | Direction for the buyer | Evidence that decides the claim |
|---|---|---|---|
| Factory MEP rough-in labor | Ductwork, risers, branch wiring, panel build, pressure testing, all performed at the module station | Falls 60–70% against site labor hours | Takt time per station and hours per module from the plant's production record, not a benchmark study |
| Plant overhead allocation | Supervision, QA, covered workspace, plant utilities charged to the module | Rises 8–12% against open-shop site rate | Rate build-up showing the allocation, requested at tender stage |
| Module-to-module connection labor | Duct closures, riser couplings, busway joins, fire-stopping at every interface | New cost that has no site-built equivalent | Per-joint labor allowance in the tender, multiplied by the joint count on the drawings |
| Freight increment from MEP weight | Additional tonnes of rough-in carried on every module | Rises with distance, neutral under ~800 km | Freight quote itemised by weight band, not a single lump sum |
| Design and coordination fees | MEP coordination model, clash resolution, shop drawings, delegated design where applicable | Front-loaded, typically higher than a site-built fee | Fee schedule split by stage, with the coordination scope described |
| Rework avoided | Clashes found in the model instead of the ceiling | Falls sharply, the largest single saving on dense projects | Clash log with resolved count and the date each was closed |
Read the two direction columns together. A modular MEP package is not cheaper because the labor rate is lower, it is cheaper because the rework line collapses and the schedule compresses. Where the project is simple enough that site rework would have been low anyway, the factory premium and the joint labor can outweigh the gain, and we say so before a contract rather than after. The same arithmetic applies to lab and cleanroom fits, where the services density is far higher: see lab and research facilities and clean rooms for semiconductor work for the density ranges those building types carry.
Interface Ownership at the Module Joint
Every MEP failure we have been called back to investigate after handover happened at a module interface, and almost every one of them was an ownership question before it was an engineering question. The factory delivers a module with services terminating at the module face under a defined convention. The site trade joins two of those faces. Between the two there are six elements, and only some of them are obviously somebody's scope.
The table assigns each element once, states what the drawing has to show for the assignment to be unambiguous, and records what it costs when the question surfaces during commissioning rather than during design.
| Element at the joint | Who owns it | What the drawing must show | Cost when it is unassigned |
|---|---|---|---|
| Duct spigot and plenum collar | Factory (installed), site crew (clamped) | Spigot length, collar type, gasket class, and the pressure class the joint is tested to | Leakage test failure requiring the ceiling to be opened in a completed module, 3–6 weeks |
| Plumbing riser coupling | Site crew | Coupling type (press, no-hub, fusion), access opening size and location | Access opening cut after finishes, patch and repaint per affected unit |
| Electrical busway or feeder joint | Factory (busway supplied), site electrician (energised joint) | Torque specification, joint inspection record, and who signs the energisation certificate | Second electrical inspection and a delay to energisation for the whole floor |
| Fire-stopping at the joint cavity | Site crew, and this is the one that is genuinely nobody's by default | Tested system reference, packing density, sealant depth, and the inspection hold point | Fire marshal rejection at final inspection, the most expensive single outcome on this list |
| Joint cavity space allocation | Design team (coordination model) | Reserved zone per trade inside the cavity, clash-cleared, with a stated tolerance | Field-forced rerouting of one service, which breaks the tolerance on two others |
| Commissioning data at the joint | Factory (module-level), commissioning agent (system-level) | Which test records cross the boundary and in what format | System not formally accepted until the records are rebuilt, typically 2–4 weeks at handover |
Fire-stopping deserves the emphasis it gets in that table. It exists only in the gap between two scopes: the factory has finished its module, the site crew has not yet started its penetration sealing, and the drawing often shows a fire rating without showing who achieves it. On a project with 180 module interfaces that gap is 180 unfunded items until somebody notices. We write the fire-stopping scope, the tested system reference and the inspection hold point into the interface schedule at design freeze, and we ask the fire consultant to sign the schedule rather than the drawing note. The factory QC systems page describes how the module-side half of that evidence is captured before dispatch.
Commissioning in the Factory Instead of on Site
Commissioning is where a modular project either recovers its schedule advantage or gives it back. Site-built commissioning is inherently sequential: the building must be closed, power must be on, water must be pressurised, and each system is proved only after everything upstream of it works. A factory module allows most of that proof to happen months earlier, on a module that is complete and dry, with the trades who installed the systems standing next to the tester.
The hold points below are the ones we treat as contractual on a services-dense project. Each names what is proved, when it happens relative to the production sequence, and what a buyer should receive at that point. A programme that skips a hold point does not save the time, it moves the discovery to site where the same test costs several times as much.
| Hold point | What is proved | When it happens | What the buyer receives |
|---|---|---|---|
| Coordination model frozen | No unresolved clashes in the joint cavity or the ceiling plenum | Before any framing starts | Clash report with zero open items and the sign-off date |
| Rough-in inspection | Routes, supports, penetrations and fire-stopping backing match the model | Before the ceiling is closed | Photographic record per module, indexed by the model element ID |
| Pressure test, plumbing | Risers and branch lines hold test pressure for the specified duration | Ceiling closed, before finishes | Signed test sheet with gauge reading, duration and tester identity |
| Duct leakage test | Ductwork meets the specified leakage class at the module boundary | Before the module leaves the station | Test report per duct run, not a single building-level summary |
| Electrical continuity and insulation resistance | Every circuit prewired in the module is continuous and correctly identified | Before the panel is energised for the first time | Circuit schedule with test values, matched to the panel schedule |
| Module-level pre-functional check | Each system runs in the module as an isolated unit: fans turn, pumps circulate, controls respond | At the factory, before dispatch | Pre-functional checklist signed by the plant QA lead |
| System integrated test | Systems work across module boundaries as one building | On site, after all modules are set and connected | Integrated test record with the joint-by-joint results |

Two hold points in that table are usually missing from a modular MEP programme: the module-level pre-functional check, which is the only point at which a defect can be fixed by the crew that caused it without a crane, a road closure or a second mobilisation, and the integrated test, which is the only point at which the joint evidence becomes building evidence. Buyers who ask for both at tender stage get them; buyers who ask at handover get a negotiation.
Certifications, Standards and the Documents They Depend On
MEP claims are auditable in a way that most construction claims are not, because the work is inspectable at the moment it is done and the record can be issued with the module. The standards below govern the parts of a modular MEP package that a buyer actually ends up relying on, and each is paired with the document that proves compliance on a specific project.
| Standard or certification | What it governs | Applies to | Document that proves it |
|---|---|---|---|
| SMACNA duct construction and leakage classes | Duct gauge, reinforcement, joint construction and permitted leakage | Every duct run, including the module boundary spigot | Leakage test report per run with the class stated |
| ASHRAE 62.1 and 90.1 | Ventilation rates and energy performance of the systems as designed | Occupied spaces, particularly dense or high-occupancy rooms | Ventilation calculation and the commissioning record that verifies delivered airflow |
| NFPA 13 and local sprinkler rules | Sprinkler layout, hydraulic calculation, and the interface at the module joint | Any occupied building above the relevant threshold | Hydraulic calculation with the joint detail, plus the contractor's material and test certificate |
| IEC 60364 and NFPA 70 | Circuit design, protection, earthing and identification | All prewired modules and all joint connections | Circuit schedule, insulation resistance values, and the inspection certificate for the energised joint |
| ISO 9001 at the plant | Process control behind the production record | The factory, not the project | Current certificate with the address that matches the plant that built the modules |
| AHJ acceptance | Local adoption of all of the above, including any amendments | The project jurisdiction | Pre-submission meeting minutes and the approved inspection sequence |
The last row is the one that decides the others in practice. A plant can hold ISO 9001, test ducts to SMACNA and prewire to NFPA 70, and still have its modules rejected because the local authority wants to witness a test that was performed in a factory 4,000 km away. The fix is procedural and cheap if it happens early: agree the inspection sequence with the authority having jurisdiction before the first module is built, and where remote witnessing is not accepted, agree which tests are repeated on site. Projects that settle this at design stage rarely have an inspection problem; projects that leave it to commissioning have one on every floor. The delivery sequence through those gates is set out on the MODURA process page, and the warranty position on services is treated in warranties and structural guarantees.
What We Decline to Take On
Four things we will not put in a modular MEP proposal, each for a reason a buyer can check.
We will not guarantee an energy consumption figure. We will model the systems, commission them, and hand over verified airflow and power data, but consumption depends on occupancy, setpoints and how the building is operated. A vendor who guarantees kilowatt hours is underwriting somebody else's behaviour. We will commit to the design load and prove delivered performance at commissioning, which is the part we control.
We will not accept design responsibility for the base building systems. If the mechanical plant, risers or electrical service upstream of our modules are designed by another party, we connect to them and we report what we find, but we do not take design liability for someone else's capacity calculation. Where a single point of responsibility is wanted, the whole MEP design has to sit with us from concept.
We will not price a fixed per-joint rate before the joint count is known. The joint count comes from the floor plan and the module breakdown. A tender that quotes a connection allowance without a drawing is quoting a number that will move, and our position is that it should be quoted as an allowance with a stated rate instead of as a fixed sum.
We will not commission a building we did not connect. If the module-to-module connections are made by a third-party trade, we will witness and document them, but the integrated test certificate has to be signed by the party who made the joints. Splitting that signature is how a commissioning dispute becomes a warranty dispute.
Questions We Are Asked Before Every MEP Integration Contract
These are the questions that come up in pre-contract discussions with developers, main contractors and facilities teams. The answers are the ones we actually give.
| Question | What we answer |
|---|---|
| Can you hold the site labor saving in a fixed price? | We can hold a fixed price once the module breakdown and the joint count are frozen. Before that the connection labor and the coordination fee both carry real uncertainty, and we would rather show the allowance than bury it in a contingency line. The price gate follows the drawing gate. |
| Who is responsible if a joint leaks after handover? | Whoever made it, and the test records establish who that was. Each joint is tested and recorded at the hold point, so a leak resolves to a specific joint, a specific test sheet and a specific crew. That is a better position than site-built work, where the ceiling is closed before anyone knows which joint is at fault. |
| How much of the commissioning can happen before the modules arrive? | All pre-functional checks, all module-level tests and every pressure and leakage test. The integrated system test has to happen on site because it is testing the connection, not the module. On a typical project that is 70–80% of the test hours moved off the critical path. |
| What happens if the local authority will not accept factory test records? | We agree the inspection sequence with them before fabrication, and where remote witnessing is refused we budget the repeat test on site. Discovering that requirement at commissioning is the failure mode; a pre-submission meeting costs a day and removes it. |
| Can we change the MEP design after the first modules are built? | Yes, at the module level and at a cost that rises steeply with stages completed. A change before framing is a drawing revision; a change after rough-in is a rework of a finished module; a change after the module is set is a site modification of work that was designed to be done in a plant. The freeze points are in the programme for exactly this reason. |
| Does factory MEP work make future renovation harder? | No, it makes it more predictable. Every system component is recorded to module-level accuracy in the as-built model, and access panels sit at every valve, controller and junction. A renovation team locates a shutoff from the model instead of opening walls. What is harder is moving a service between modules, because that crosses an interface rather than a partition, and that should be planned rather than improvised. |
The bathroom pod comparison covers the wet-area half of the same question, and data center construction shows what the same interface discipline looks like at a much higher services density. Where the project is a fit-out inside an existing building rather than new construction, the connection logic still holds but the interface schedule is written against an existing structure, which is a different exercise and one we scope separately.
Common Concerns, Maintenance Access and Renovation
Two concerns raise their head in almost every pre-contract meeting on a services-dense modular project: whether the factory-made connections will hold, and whether a building full of pre-installed services can be maintained and altered afterwards. Both have specific answers rather than assurances.
On the connections. The interfaces where services cross from one module to the next are engineered assemblies with a published specification, not site improvisations. Duct spigots are clamped to plenum collars with gaskets rated for the duct pressure class and the joint is leak-tested at the module boundary before dispatch. Riser couplings are press-fit for copper, no-hub for cast iron and fusion-welded for HDPE, all approved for concealed spaces. Busway joints are torque-controlled and signed off by the electrician who energises them. Fire-stopping uses a tested system with a stated packing density and sealant depth. The problem is not that these details are unknown; it is that on a drawing they can all be shown as a single line and left unassigned, which is why we publish the interface schedule described above and ask the fire consultant to sign it. The interface half of the topic is treated in modular offshore and marine platforms, where the same joints are exposed to a far harsher service environment.
On maintenance and renovation. Factory installation makes a building easier to maintain than site-built work, for one structural reason: every valve, controller, junction and damper is recorded in the as-built model at module-level accuracy, and access panels are drawn at each of them rather than cut where the ceiling happened to allow. A facilities team locates a shutoff from the model instead of opening ceilings at random. The honest limitation is the reverse case. Moving a service within a module is straightforward; moving it between modules crosses an interface, and that requires a joint to be opened, tested and re-certified, which is a scheduled intervention rather than a weekend job. Renovation programmes on modular buildings should be planned at the interface level for that reason, and the lifecycle cost evidence for the maintenance side is set out in modular building lifecycle costs. Where a client expects both long service life and repeated fit-out changes, the design response is to concentrate the changeable services in a dedicated accessible chase at the corridor side of the module, which costs about 2 percent of floor area and removes most of the future difficulty.

Planning a project that would benefit from factory-integrated MEP systems? Contact our engineering team for a feasibility assessment including BIM coordination scope, MEP labor hour projections, and factory commissioning protocols. Free consultations available for projects with 50+ modules.